This weekend, for the first time this year, it felt like spring might actually arrive. Two whole days of relative warmth and sunshine can convince the most frozen and winter weary among us. Even the daffodils are starting to poke their heads out of the ground in anticipation.
However, for me, the most conclusive evidence of all that spring might be near is that stores are starting to sell gardening seeds. Having worked in the retail world for almost 20 years now, I have this Pavlovian response when I see the UPS man bringing boxes of seeds into the store. My spirits lift, the color green flashes before my eyes and I have an overwhelming desire to make an appointment at the bike shop for a tune up.
It’s no wonder that the sight of seeds provokes such strong emotions. Civilization owes its existence to these tiny bundles of new life. It was at least 10,000 years ago when humans first discovered that they could save the seeds of wild plants over the winter then plant them in anywhere they chose.
This small discovery has led to amazing changes. Settlements developed when humans no longer needed to move around to find food, but instead needed to stay put to tend their crops. When one person could grow the food for many, it freed up time to create art and to fight battles. Writing and arithmetic were invented to deal with the accounting of this excess food. Animals were domesticated since it was now possible to feed them as well.
Unfortunately, all the changes weren’t positive. Wars were probably invented not long after agriculture, since now rulers could afford to feed their troops. New diseases sprang up from people living in close quarters. Diets were greatly simplified from the previous variety of the hunter-gather, which led to deficiency and poor health (something we’re still trying to overcome).
You probably remember a lot of this from high school history class, but have you ever stopped to think about what an incredible thing a seed is. Seeds are like miniature space ships for the next generation of a plant. Everything the plant needs to survive its journey from parent to adolescence is contained inside the seed coat: the embryo of the plant, a good-sized food supply, and protection from the elements and predators.
And lucky for us, some of these seeds are also tasty and nutritious. Grains, legumes, and nuts are the groups of seeds we eat the most.
And eat them we do. Seeds provide the bulk of calories for the 7 billion humans currently on the planet (and the cynic in me thinks that seeds, or more specifically agricultural, is probably the reason there are so damned many of us). Worldwide, we grow and consume over 600 metric tons per year of rice alone.
Of the three groups of edible seeds, grains (the seeds of grasses) play the most dominant role in our diet (and is really what I intended to talk about in this article before I got all distracted by history and space ships). Wheat, rice and corn form the bulk of the diets for most people on earth (in the States, we prefer to feed it all to animals first and then eat the animals but that’s a topic for a different article).
These three grains were also the first grains to be domesticated. Wheat was developed in the Fertile Crescent around the same time that rice was being developed in China; as long as 12,000 years ago. Corn is a relative newcomer to the domestic grass scene and first appears in South and Central America around 6,000 years ago (although there is still much controversy about the exact time and place of corn’s origin).
The structure of all grains is similar. There is the outside seed coat which is there to protect the embryo and regulate the amount of water allowed to pass inside the seed. It is the seed coat that is removed when grains are refined. This makes the grains whiter and quicker cooking, since water can now easily pass through the grain.
However, the layer below the seed coat, the aleurone layer, is also removed when grains are refined. This thin layer (only one to four cells thick) is where all the good stuff is. It’s high in oil, minerals, protein, vitamins, and flavor.
Below the aleurone layer is the bulk of the grain, the endosperm. This is the food storage area for the embryo. It is composed of mostly starch in a matrix of protein. The closer you get to the center of this mass, the more starch there is and the less protein. So the more refined a grain is, the less nutritional value it contains.
Last but not least is the embryo, or germ. The embryo is located close to the outer wall of the seed so it can easily emerge and start growing a new plant when the conditions are right. The germ is rich in oils, enzymes and flavor. But, alas, is also lost in refinement.
Refining grains has given us white bread and white rice. But it’s also given us the disease beriberi; the result of a diet that relies too heavily on refined rice, which lacks thiamine. Refining robs us of most of the fiber, oil and B vitamins in the whole grain and leaves us with mostly starch.
So why do we refine grains? That’s a good question. Stay tuned in two weeks to find out the answer.
To Be Continued…
Sprouted Wheat Berries
1/3 c Whole Wheat Berries
1-Quart Glass Jar
Cheesecloth or sprouting lid
Soak the wheat berries overnight in 1 quart of tepid water. In the morning, rinse the berries in tepid water and drain completely (save the soaking water for your plants, they’ll love you for it). Place the rinsed berries in the jar. To make draining and rinsing the seeds easier, place a piece of cheesecloth over the jar and secure with a rubber band or a metal ring. If you have a sprouting screen, you can use that as well. Place the jar in a dark place, like a cupboard or pantry.
Rinse and drain the seeds twice a day for two days. They should be sprouting by then. Place them in cold water and gently separate them. You will want to use them right away, since this is when they are at their nutritional peak. They can be stored in a tightly sealed container in the refrigerator for a couple of days.
You can eat them in salads or bake them into bread or throw them into a hot vegetable dish during the last moments of cooking. They are sweet and nurishing
Tuesday, March 15, 2011
Tuesday, February 15, 2011
This Little Piggy Went To Market
Jon and I bought our first pig this year. Well, not a whole pig, just half of one (but it still took up much of our freezer). We bought it from local pig and bison farmers, Kevin and Anita Porter of Selkirk Bison Ranch. They pasture raise Tamworth pigs on their ranch in Elmira.
We’d been thinking about buying a pig for quite some time. Pork is a staple in our diet and it seemed silly to keep buying it one package at a time. Buying a whole pig would save us some money and I could experiment with making my own sausage and bacon.
When I talked to Wood’s Meat about how we wanted our pig processed, they were a bit surprised but unfazed by my request to have the belly left whole (for bacon), the shoulder just cut up and packaged in 2 pound blocks (for sausage) and all the fat saved (for rendering lard).
The night we brought our pig home from the processor, I just had to try making up a batch of sausage. It turns out that making sausage isn’t too difficult as long as you have a meat grinder. The shoulder is the perfect part of the pig to use. It naturally has the correct ratio of fat to meat that makes savory sausages.
My ancient Kitchen Aid, with its grinder attachment, made short work of the shoulder meat that Woods had cubed up for us. We were happily eating pasta with homemade sweet Italian sausage in less than an hour. It was just about the best sausage ever.
I attribute the sausage’s deliciousness to the pig. Tamworth is a rare breed of pig with its roots in England. There are thought to be less than 4000 of these tough but beautiful dark red animals left in the world. They were bred to be outdoors (not crammed into CAFOs, and thus their threatened status) and can withstand cold winters while their red skin protects them from sunburn in the summer. They are great foragers and the Porters have their pigs follow the bison to help rejuvenate the pasture. Most importantly, Tamworth pigs make great bacon.
Bacon isn’t the only reason humans have been keeping domesticated pigs for the last 12,000 years. Pigs provide a wide and diverse range of things to eat. Humans have figured out how to use everything from the ears and snout to the trotters (feet) and make it taste good. The blood is used to make sausage, the rendered fat yields one of the best shortenings for baking, the liver is prized for pates, and even the skin can be slow cooked into a succulent dish or fried up into crispy pork rinds. And that’s just the nasty bits. The hams, belly, tenderloin, and ribs offer varied flavors and preparations. When combined with salt and smoke, the taste can approach nirvana.
Sadly, most pigs in the U.S. are not raised the way our pig was. Most of the pork you can buy is raised in CAFOs where up to 700,000 hogs are raised in giant warehouses, the pigs packed together, their tails docked so they don’t bite them off, and fed a diet of corn and soy with a hefty dose of antibiotics to keep them from getting sick from their unnatural close confinement. Their waste is stored in enormous lagoons, where it can get into the water table or, in the case of a lagoon in North Carolina in 1995, release 25 million gallons of excrement into a nearby river, killing millions of fish. I can’t even imagine the smell.
CAFO pigs are not just unhealthy for the environment but they’re not that great for us either. Some of the antibiotics and growth hormones given to pigs raised on confinement farms get stored in their meat and fat and then gets passed on to us when we eat it. Plus pigs that eat an all grain diet have much higher levels of omega-6 fatty acids and very low levels of omega-3s. This distorted ratio has been linked to a variety of diseases including obesity, diabetes, inflammatory diseases, and cancer.
Grass-fed pigs, on the other hand, have a much lower ratio on omega-6 to omega-3. The total fat and the saturated fat levels in pasture-raised pork are lower and they have higher levels of antioxidants. Plus they just taste better.
We’ve been eating our grass-fed pig for over a month now and, while at first I thought it would take us a long time to eat it all, I’m now realizing that there are so many different recipes I’d like to try we might be in the market for another one soon. Next time it will be a whole pig (and maybe another freezer).
Fresh Garlic Sausage
Makes approximately 2 pounds
2 lbs pork shoulder, diced and very cold, with all visible sinew removed (there should be a 3:1 meat to fat ratio, if the meat is lean, add more fat)
.5 oz Kosher Salt
1 T minced garlic
2 t coarse ground black pepper
1 T red pepper flakes (optional)
1/3 cup good red wine (ice cold
Mix first five ingredients together in a large bowl. If you have time, refrigerate for up to 24 hours.
Place a mixing bowl into a larger bowl full of ice (if you are using a Kitchen Aid, use the mixing bowl from it). Grind the meat mixture into this bowl using the small die of a meat grinder. Make sure that the meat is coming out in distinct cylinders and that there is a distinction between the meat and fat. If the extrusion looks like pink mush, either the blades of the grinder are dull or there is sinew caught in the blade. Stop and check the blade before proceeding or the texture of the sausage may be ruined.
Once all of the meat is ground, add the wine and mix (using the paddle attachment of the Kitchen Aid or a study spoon) until all the wine is absorbed and the mixture is uniform and sticky looking. This should take about 2 minutes on medium speed and about ten minutes with a spoon.
If you have a sausage stuffer, you can stuff it into casing but I use this small batch for making pasta sauce or sausage patties. Make sure to cook the sausage gently and just to a 150F internal temperature. Overcooked fresh sausage is a sad thing.
We’d been thinking about buying a pig for quite some time. Pork is a staple in our diet and it seemed silly to keep buying it one package at a time. Buying a whole pig would save us some money and I could experiment with making my own sausage and bacon.
When I talked to Wood’s Meat about how we wanted our pig processed, they were a bit surprised but unfazed by my request to have the belly left whole (for bacon), the shoulder just cut up and packaged in 2 pound blocks (for sausage) and all the fat saved (for rendering lard).
The night we brought our pig home from the processor, I just had to try making up a batch of sausage. It turns out that making sausage isn’t too difficult as long as you have a meat grinder. The shoulder is the perfect part of the pig to use. It naturally has the correct ratio of fat to meat that makes savory sausages.
My ancient Kitchen Aid, with its grinder attachment, made short work of the shoulder meat that Woods had cubed up for us. We were happily eating pasta with homemade sweet Italian sausage in less than an hour. It was just about the best sausage ever.
I attribute the sausage’s deliciousness to the pig. Tamworth is a rare breed of pig with its roots in England. There are thought to be less than 4000 of these tough but beautiful dark red animals left in the world. They were bred to be outdoors (not crammed into CAFOs, and thus their threatened status) and can withstand cold winters while their red skin protects them from sunburn in the summer. They are great foragers and the Porters have their pigs follow the bison to help rejuvenate the pasture. Most importantly, Tamworth pigs make great bacon.
Bacon isn’t the only reason humans have been keeping domesticated pigs for the last 12,000 years. Pigs provide a wide and diverse range of things to eat. Humans have figured out how to use everything from the ears and snout to the trotters (feet) and make it taste good. The blood is used to make sausage, the rendered fat yields one of the best shortenings for baking, the liver is prized for pates, and even the skin can be slow cooked into a succulent dish or fried up into crispy pork rinds. And that’s just the nasty bits. The hams, belly, tenderloin, and ribs offer varied flavors and preparations. When combined with salt and smoke, the taste can approach nirvana.
Sadly, most pigs in the U.S. are not raised the way our pig was. Most of the pork you can buy is raised in CAFOs where up to 700,000 hogs are raised in giant warehouses, the pigs packed together, their tails docked so they don’t bite them off, and fed a diet of corn and soy with a hefty dose of antibiotics to keep them from getting sick from their unnatural close confinement. Their waste is stored in enormous lagoons, where it can get into the water table or, in the case of a lagoon in North Carolina in 1995, release 25 million gallons of excrement into a nearby river, killing millions of fish. I can’t even imagine the smell.
CAFO pigs are not just unhealthy for the environment but they’re not that great for us either. Some of the antibiotics and growth hormones given to pigs raised on confinement farms get stored in their meat and fat and then gets passed on to us when we eat it. Plus pigs that eat an all grain diet have much higher levels of omega-6 fatty acids and very low levels of omega-3s. This distorted ratio has been linked to a variety of diseases including obesity, diabetes, inflammatory diseases, and cancer.
Grass-fed pigs, on the other hand, have a much lower ratio on omega-6 to omega-3. The total fat and the saturated fat levels in pasture-raised pork are lower and they have higher levels of antioxidants. Plus they just taste better.
We’ve been eating our grass-fed pig for over a month now and, while at first I thought it would take us a long time to eat it all, I’m now realizing that there are so many different recipes I’d like to try we might be in the market for another one soon. Next time it will be a whole pig (and maybe another freezer).
Fresh Garlic Sausage
Makes approximately 2 pounds
2 lbs pork shoulder, diced and very cold, with all visible sinew removed (there should be a 3:1 meat to fat ratio, if the meat is lean, add more fat)
.5 oz Kosher Salt
1 T minced garlic
2 t coarse ground black pepper
1 T red pepper flakes (optional)
1/3 cup good red wine (ice cold
Mix first five ingredients together in a large bowl. If you have time, refrigerate for up to 24 hours.
Place a mixing bowl into a larger bowl full of ice (if you are using a Kitchen Aid, use the mixing bowl from it). Grind the meat mixture into this bowl using the small die of a meat grinder. Make sure that the meat is coming out in distinct cylinders and that there is a distinction between the meat and fat. If the extrusion looks like pink mush, either the blades of the grinder are dull or there is sinew caught in the blade. Stop and check the blade before proceeding or the texture of the sausage may be ruined.
Once all of the meat is ground, add the wine and mix (using the paddle attachment of the Kitchen Aid or a study spoon) until all the wine is absorbed and the mixture is uniform and sticky looking. This should take about 2 minutes on medium speed and about ten minutes with a spoon.
If you have a sausage stuffer, you can stuff it into casing but I use this small batch for making pasta sauce or sausage patties. Make sure to cook the sausage gently and just to a 150F internal temperature. Overcooked fresh sausage is a sad thing.

Tuesday, January 18, 2011
Sushi Love American Style
We rang in the New Year in grand style this year; we hosted a roll your own sushi party. We stuffed ourselves silly with little hand rolls (temaki) filled with everything from flying fish roe (tobiko) to soy sauce-and-mirin-braised lamb (for which I am pretty sure there is no Japanese word).
Sushi has been a favorite food of mine since the first time I tried it in land-locked St. Louis over twenty years ago. My friend, Adam, who introduced me to this incredible cuisine, was a sushi connoisseur (or at least I thought so at the ripe-old age of 20) and ordered for the table. Our first round included octopus (tako), squid (ika), and sea urchin (uni) with a raw quail egg. I think he was testing me to see how adventurous an eater I was. I ate every bite.
My friend disappeared from my life but sushi is still one of my favorite foods. If given a choice of cuisines, it’s always first on the list. I don’t think I’m alone. The fact that you can get sushi in Sandpoint and almost anywhere else in the US attests to its popularity.
The sushi we know and love today is a far cry from its beginnings in China in the 3rd century BC! Back then sushi, which translates to “sour tasting”, was a way to preserve fish. The fish was packed in rice and salt and left to ferment for long periods of time. The rice was then discarded and only the fish was eaten (and I’m guessing it was pretty sour by then).
Eventually this technique made its way to Japan where vinegar was added to the process and the rice was eaten as well as the fish. The addition of vinegar to the rice also made the fermentation process faster and it took only days instead of weeks or months for the sushi to be ready.
At some point in the late 1600s in Tokyo (then known as Edo) someone figured out how to make fast food sushi, where the fish was raw and the rice was cooked then seasoned with vinegar rather than fermented. The idea caught on quickly in cosmopolitan Edo, where the pursuit of pleasure was the fashion of the day. Sushi carts and stands popped up at sumo-wrestling matches, at the theatre, the baths and the brothels.
But fast food is not really an accurate description of sushi. Yes, the sushi chef might make it look quick and easy while you are sitting at the sushi bar but sushi chefs in Japan undergo a ten-year apprenticeship. They learn everything there is to know about fish and rice (not to mention nori, wasabi, ginger, and soy sauce) and spend three of the ten years just working on knife skills.
One of the most deceptively simple examples of nigiri sushi (those hand molded blocks of rice with a tasty morsel on top) is hen’s egg (tamago). It looks like a block of omelet but it is lighter, fluffier and tastier than any American omelet. Each sushi chef has their secret recipe, which often includes shrimp or fish broth, sugar and sake. The omelets are made in a special pan, in thin layers that are folded over one another. Good tamago, which is lightly brown on the outside but soft and supple on the inside, is time consuming to make and is considered a great way to tell how good the chef really is.
As in all Japanese cooking, the aesthetics of the food are at least as important as the taste. The fish is cut in just such a way and with just the right knife to reveal the beauty and texture of each part of the fish. Sushi is arranged in ways that mimic or call to mind natural settings. Nigiri is served in pairs, hoso-maki (thin nori wrapped sushi) is cut into six piece, and futo-maki (thick rolls) are cut into eight pieces.
But don’t let all of that tradition and complex knife skills deter you from making sushi at home. And don’t feel like you have to make it with raw fish, even though you can get good sushi grade fish in town (from Flying Fish, who also carries just about everything else you need for sushi), there are all kinds of things you can roll up in nori and rice.
Coming up with different fillings for your guests to roll is half the fun of having a roll your own sushi party (which, I found out while writing this article, is not just some American bastardization of the cuisine but something the Japanese invented). You can stick with the standards like cucumber, avocado, salmon and shrimp or you can go crazy and add ham and eggs or even bacon for a BLT roll. Make small amounts of different fillings and let your guests come up with their own combinations. Have some wasabi, different flavored sauces, and home made pickled ginger on hand as well.
However, the most important element for your sushi party is the rice. After all, sushi is about 80 percent rice so it better be good. The only bad sushi I’ve had has been because the rice was either flavorless or too wet or dry. Taking the time to make your sushi rice delicious will make anything you roll up in it divine.
The second half of the fun is, of course, eating all the great combinations that can be made with the ingredients you provide. But beware, they will probably all taste good and you’ll want to keep trying new ones until you are stuff. The nice thing about that is you don’t have to worry about dessert.
Sushi Rice (Sumeshi)
Makes about 4 cups
2 c. short grain sushi rice
3 c. cold water
3 T. rice vinegar
1 ½ T. sugar
1 t. salt
Place the rice in a fine mesh colander and run cold water over it while gently stirring the rice. When the water runs clear (about a minute) fan the rice up the sides of the colander set it aside to dry for 30 minutes.
Place the rice and water in a 2 quart saucepan with a tight fitting lid. Bring to a boil then reduce heat to medium for 5 minutes then down to very low for 15 minutes. Bring the heat back up to high for a minute until steam escapes the lid. Remove from heat and set aside to rest for 10 minutes.
Meanwhile heat the vinegar, sugar and salt together until the sugar and salt just dissolve.
Place the rice in a thin layer in a flat wooden bowl or glass tray that is slightly wetted. Slowly pour the vinegar mixture over the rice while folding it in and fanning it at the same time (it nice to have a third hand help at this point). Continue folding in the vinegar until it is well dispersed and the rice has cooled a bit. The individual grains should be coated and glossy. Use immediately or cover with a damp towel and use in the next hour or two. Sushi rice does not keep well and shouldn’t be made too far ahead of time.
Sushi has been a favorite food of mine since the first time I tried it in land-locked St. Louis over twenty years ago. My friend, Adam, who introduced me to this incredible cuisine, was a sushi connoisseur (or at least I thought so at the ripe-old age of 20) and ordered for the table. Our first round included octopus (tako), squid (ika), and sea urchin (uni) with a raw quail egg. I think he was testing me to see how adventurous an eater I was. I ate every bite.
My friend disappeared from my life but sushi is still one of my favorite foods. If given a choice of cuisines, it’s always first on the list. I don’t think I’m alone. The fact that you can get sushi in Sandpoint and almost anywhere else in the US attests to its popularity.
The sushi we know and love today is a far cry from its beginnings in China in the 3rd century BC! Back then sushi, which translates to “sour tasting”, was a way to preserve fish. The fish was packed in rice and salt and left to ferment for long periods of time. The rice was then discarded and only the fish was eaten (and I’m guessing it was pretty sour by then).
Eventually this technique made its way to Japan where vinegar was added to the process and the rice was eaten as well as the fish. The addition of vinegar to the rice also made the fermentation process faster and it took only days instead of weeks or months for the sushi to be ready.
At some point in the late 1600s in Tokyo (then known as Edo) someone figured out how to make fast food sushi, where the fish was raw and the rice was cooked then seasoned with vinegar rather than fermented. The idea caught on quickly in cosmopolitan Edo, where the pursuit of pleasure was the fashion of the day. Sushi carts and stands popped up at sumo-wrestling matches, at the theatre, the baths and the brothels.
But fast food is not really an accurate description of sushi. Yes, the sushi chef might make it look quick and easy while you are sitting at the sushi bar but sushi chefs in Japan undergo a ten-year apprenticeship. They learn everything there is to know about fish and rice (not to mention nori, wasabi, ginger, and soy sauce) and spend three of the ten years just working on knife skills.
One of the most deceptively simple examples of nigiri sushi (those hand molded blocks of rice with a tasty morsel on top) is hen’s egg (tamago). It looks like a block of omelet but it is lighter, fluffier and tastier than any American omelet. Each sushi chef has their secret recipe, which often includes shrimp or fish broth, sugar and sake. The omelets are made in a special pan, in thin layers that are folded over one another. Good tamago, which is lightly brown on the outside but soft and supple on the inside, is time consuming to make and is considered a great way to tell how good the chef really is.
As in all Japanese cooking, the aesthetics of the food are at least as important as the taste. The fish is cut in just such a way and with just the right knife to reveal the beauty and texture of each part of the fish. Sushi is arranged in ways that mimic or call to mind natural settings. Nigiri is served in pairs, hoso-maki (thin nori wrapped sushi) is cut into six piece, and futo-maki (thick rolls) are cut into eight pieces.
But don’t let all of that tradition and complex knife skills deter you from making sushi at home. And don’t feel like you have to make it with raw fish, even though you can get good sushi grade fish in town (from Flying Fish, who also carries just about everything else you need for sushi), there are all kinds of things you can roll up in nori and rice.
Coming up with different fillings for your guests to roll is half the fun of having a roll your own sushi party (which, I found out while writing this article, is not just some American bastardization of the cuisine but something the Japanese invented). You can stick with the standards like cucumber, avocado, salmon and shrimp or you can go crazy and add ham and eggs or even bacon for a BLT roll. Make small amounts of different fillings and let your guests come up with their own combinations. Have some wasabi, different flavored sauces, and home made pickled ginger on hand as well.
However, the most important element for your sushi party is the rice. After all, sushi is about 80 percent rice so it better be good. The only bad sushi I’ve had has been because the rice was either flavorless or too wet or dry. Taking the time to make your sushi rice delicious will make anything you roll up in it divine.
The second half of the fun is, of course, eating all the great combinations that can be made with the ingredients you provide. But beware, they will probably all taste good and you’ll want to keep trying new ones until you are stuff. The nice thing about that is you don’t have to worry about dessert.
Sushi Rice (Sumeshi)
Makes about 4 cups
2 c. short grain sushi rice
3 c. cold water
3 T. rice vinegar
1 ½ T. sugar
1 t. salt
Place the rice in a fine mesh colander and run cold water over it while gently stirring the rice. When the water runs clear (about a minute) fan the rice up the sides of the colander set it aside to dry for 30 minutes.
Place the rice and water in a 2 quart saucepan with a tight fitting lid. Bring to a boil then reduce heat to medium for 5 minutes then down to very low for 15 minutes. Bring the heat back up to high for a minute until steam escapes the lid. Remove from heat and set aside to rest for 10 minutes.
Meanwhile heat the vinegar, sugar and salt together until the sugar and salt just dissolve.
Place the rice in a thin layer in a flat wooden bowl or glass tray that is slightly wetted. Slowly pour the vinegar mixture over the rice while folding it in and fanning it at the same time (it nice to have a third hand help at this point). Continue folding in the vinegar until it is well dispersed and the rice has cooled a bit. The individual grains should be coated and glossy. Use immediately or cover with a damp towel and use in the next hour or two. Sushi rice does not keep well and shouldn’t be made too far ahead of time.
Sunday, January 16, 2011
It's Better with Butter
Butter-just the word makes my mouth water. Visions of flaky piecrusts, fresh steamed vegetables glistening with that golden glaze, and shortbread melting in my mouth spring to mind when I think about it.
And butter is often on my mind during the holiday season. It’s hard to do without it. Sure, you can make cookies and cakes with oil or margarine but they won’t taste as good. You can construct sauces without it, but butter will enhance any of them. You can dip fresh baked bread in olive oil, but a pat of melting butter is so much better. And don’t even bother making caramel without this key ingredient.
Butter is an essential part of my winter cooking (I think all that fat helps keep me warm and happy through the cold, dark months). Our family used at least three pounds of the stuff to get us through Thanksgiving and I’m anticipating using at least that much making holiday gifts (the Nanaimo Bar recipe I’m making calls for over a pound!).
It is the chemical structure of butter that makes it so useful and delicious. Butter is a water-in-oil emulsion, the exact opposite of the cream it is made from, which is an oil-in-water emulsion. The fat crystals and globules throughout the structure make butter solid when refrigerated, soft at room temperatures, and meltingly delicious in your mouth or in your sauce pan. These three phases allow butter to serve the cook well.
Solid butter, when incorporated with flour in the correct way and at the correct temperature, can create pastries that are crumbly like scones, flakey like piecrusts, or laminar like puff pastry. Although butter is the more difficult of the fats used in pastry making, lard and vegetable shortening have higher melting points and lower moisture contents and are therefore less fussy to work with, it imparts that one-of-a-kind buttery flavor that no amount of fake-butter-flavored Crisco can reproduce.
Softened butter can be spread on bread, of course, but can also have flavorings kneaded into it. Incorporating stock, herbs, cheese or even seafood into softened butter creates a vehicle for flavor. The fat in the butter allows the added flavors to penetrate deep into whatever it is added to. Composed butters can be used to infuse sauces, flavor vegetables and meats, or just make that pat of butter by your bread a bit fancier.
Kneading equal weights of flour and soften butter together creates yet another tool for the cook. Beurre manie or kneaded butter is a simple and quick way to thicken stocks, sauces, or gravies. Having a batch on hand in my freezer has meant the difference between serving a runny sauce or one that has the strength to cling whatever it’s put on.
Melted butter has no end of uses. First and foremost, it is the go-to topping for a bowl of popcorn. Just a small drizzle on fresh vegetables brings out their flavor and a light coat of butter on fresh noodles is a simple treat.
Melted butter does have one downside. It can’t tolerate high heat. The milk solids will burn at temperatures over 250F. Sometimes this is used to advantage as in the case of browned butter sauce, which is just butter heated until those milk particles begin to brown and take on toasted flavor notes. But if you want to fry fish in butter you will need to clarify it.
Clarified butter is butter with the whey and casein protein particles removed. It’s basically pure butterfat and can be heated up to 400F without burning. Ghee is a form of clarified butter but better. The cream for making ghee is allowed to sour and produce lactic acids, which improves the flavor and quality. When it is heated, the milk solids are allowed to brown, which imparts more flavors and produces anti-oxidants to preserve it. Ghee is revered in India as a food fit for the gods.
Now that you are dreaming of all the ways to incorporate butter into your holiday cooking, what kind of butter should you use? All butter is not created equal and, lucky for us, we have a much wider range of butters to choose from today than just ten years ago.
If you can afford it, go for organic butter. You are guaranteed that the cows were not injected with genetically engineered growth hormones (r-BGH) that raise the level of pus in their milk (yuck!). Tillamook has taken a pledge to not use r-BGH so they are a good second choice if organic is out of your price range.
Cultured butter is now readily available. This is butter made to reproduce the old fashioned way of making butter. Milk used to have to sit out for a day or two for the cream to separate. During that time, lactic acid formed and slightly soured it. The resulting butter had a more complex flavor. Today, modern butter manufacturing adds bacterial cultures to help form the lactic acid. However, some use the cheap route and just add lactic acid to the finished product. Check the label to see which method is used.
European-style butter is butter with a higher butterfat content. This higher fat content is especially useful when making pastries where the extra water in regular butter can “glue” the pastry layers together rather than aiding in separating them.
Pastured butter is butter from cows that have been eating grass rather than hay and grain. A grass diet produces butter that is softer and higher in carotenoids, which produce a deep yellow. Pasture butter is ideal for spreading and making compound butters that will be used as spreads.
Whatever butter you choose, it will enhance your cooking, because, let’s face it, everything is better with butter.
Nanaimo Bars
adapted from Swilly’s Restaurant in Pullman, Wa.
Makes 1 9”x13” pan
Bottom Layer:
¾ c butter
1/3 c sugar
2 eggs
3/8 c cocoa powder
1 ¼ c vanilla
2 ½ c graham cracker crumbs
1 ¼ c coconut
2/3 c walnuts, coarsely chopped
Middle Layer:
1 c butter, cut into small pieces at room temperature
3/8 c cream
2 T. custard powder or vanilla pudding mix
4 c powdered sugar
Top Layer:
9 oz bittersweet chocolate
½ c butter
½ T. cream (more if needed)
Bottom Layer:
In a medium size saucepan, melt butter. Remove from heat and whisk in sugar and cocoa. Whisk in eggs and stir until custard-like. Whisk in vanilla.
In a large bowl, combine graham cracker crumbs, coconut and walnuts. Mix in chocolate mixture and stir until well blended and the consistency of dough. Press into a greased 9”x13” pan. Refrigerate until cool.
Middle Layer:
In a food processor, blend butter, custard powder and cream until smooth. Add the powdered sugar 1 c. at a time until well blended. Spread mixture over well-cooled bottom layer. Make sure the layer is smooth and flat. Refrigerate until firm.
Top Layer:
In a double boiler or thick-bottomed pan on low heat, melt chocolate, butter and cream until just melted. Mixture should be pourable but not runny. Add more cream if necessary to get the correct consistency. Pour over well-chilled middle layer. Spread evenly by tilting the pan to cover.
Refrigerate well then cut into squares.
And butter is often on my mind during the holiday season. It’s hard to do without it. Sure, you can make cookies and cakes with oil or margarine but they won’t taste as good. You can construct sauces without it, but butter will enhance any of them. You can dip fresh baked bread in olive oil, but a pat of melting butter is so much better. And don’t even bother making caramel without this key ingredient.
Butter is an essential part of my winter cooking (I think all that fat helps keep me warm and happy through the cold, dark months). Our family used at least three pounds of the stuff to get us through Thanksgiving and I’m anticipating using at least that much making holiday gifts (the Nanaimo Bar recipe I’m making calls for over a pound!).
It is the chemical structure of butter that makes it so useful and delicious. Butter is a water-in-oil emulsion, the exact opposite of the cream it is made from, which is an oil-in-water emulsion. The fat crystals and globules throughout the structure make butter solid when refrigerated, soft at room temperatures, and meltingly delicious in your mouth or in your sauce pan. These three phases allow butter to serve the cook well.
Solid butter, when incorporated with flour in the correct way and at the correct temperature, can create pastries that are crumbly like scones, flakey like piecrusts, or laminar like puff pastry. Although butter is the more difficult of the fats used in pastry making, lard and vegetable shortening have higher melting points and lower moisture contents and are therefore less fussy to work with, it imparts that one-of-a-kind buttery flavor that no amount of fake-butter-flavored Crisco can reproduce.
Softened butter can be spread on bread, of course, but can also have flavorings kneaded into it. Incorporating stock, herbs, cheese or even seafood into softened butter creates a vehicle for flavor. The fat in the butter allows the added flavors to penetrate deep into whatever it is added to. Composed butters can be used to infuse sauces, flavor vegetables and meats, or just make that pat of butter by your bread a bit fancier.
Kneading equal weights of flour and soften butter together creates yet another tool for the cook. Beurre manie or kneaded butter is a simple and quick way to thicken stocks, sauces, or gravies. Having a batch on hand in my freezer has meant the difference between serving a runny sauce or one that has the strength to cling whatever it’s put on.
Melted butter has no end of uses. First and foremost, it is the go-to topping for a bowl of popcorn. Just a small drizzle on fresh vegetables brings out their flavor and a light coat of butter on fresh noodles is a simple treat.
Melted butter does have one downside. It can’t tolerate high heat. The milk solids will burn at temperatures over 250F. Sometimes this is used to advantage as in the case of browned butter sauce, which is just butter heated until those milk particles begin to brown and take on toasted flavor notes. But if you want to fry fish in butter you will need to clarify it.
Clarified butter is butter with the whey and casein protein particles removed. It’s basically pure butterfat and can be heated up to 400F without burning. Ghee is a form of clarified butter but better. The cream for making ghee is allowed to sour and produce lactic acids, which improves the flavor and quality. When it is heated, the milk solids are allowed to brown, which imparts more flavors and produces anti-oxidants to preserve it. Ghee is revered in India as a food fit for the gods.
Now that you are dreaming of all the ways to incorporate butter into your holiday cooking, what kind of butter should you use? All butter is not created equal and, lucky for us, we have a much wider range of butters to choose from today than just ten years ago.
If you can afford it, go for organic butter. You are guaranteed that the cows were not injected with genetically engineered growth hormones (r-BGH) that raise the level of pus in their milk (yuck!). Tillamook has taken a pledge to not use r-BGH so they are a good second choice if organic is out of your price range.
Cultured butter is now readily available. This is butter made to reproduce the old fashioned way of making butter. Milk used to have to sit out for a day or two for the cream to separate. During that time, lactic acid formed and slightly soured it. The resulting butter had a more complex flavor. Today, modern butter manufacturing adds bacterial cultures to help form the lactic acid. However, some use the cheap route and just add lactic acid to the finished product. Check the label to see which method is used.
European-style butter is butter with a higher butterfat content. This higher fat content is especially useful when making pastries where the extra water in regular butter can “glue” the pastry layers together rather than aiding in separating them.
Pastured butter is butter from cows that have been eating grass rather than hay and grain. A grass diet produces butter that is softer and higher in carotenoids, which produce a deep yellow. Pasture butter is ideal for spreading and making compound butters that will be used as spreads.
Whatever butter you choose, it will enhance your cooking, because, let’s face it, everything is better with butter.
Nanaimo Bars
adapted from Swilly’s Restaurant in Pullman, Wa.
Makes 1 9”x13” pan
Bottom Layer:
¾ c butter
1/3 c sugar
2 eggs
3/8 c cocoa powder
1 ¼ c vanilla
2 ½ c graham cracker crumbs
1 ¼ c coconut
2/3 c walnuts, coarsely chopped
Middle Layer:
1 c butter, cut into small pieces at room temperature
3/8 c cream
2 T. custard powder or vanilla pudding mix
4 c powdered sugar
Top Layer:
9 oz bittersweet chocolate
½ c butter
½ T. cream (more if needed)
Bottom Layer:
In a medium size saucepan, melt butter. Remove from heat and whisk in sugar and cocoa. Whisk in eggs and stir until custard-like. Whisk in vanilla.
In a large bowl, combine graham cracker crumbs, coconut and walnuts. Mix in chocolate mixture and stir until well blended and the consistency of dough. Press into a greased 9”x13” pan. Refrigerate until cool.
Middle Layer:
In a food processor, blend butter, custard powder and cream until smooth. Add the powdered sugar 1 c. at a time until well blended. Spread mixture over well-cooled bottom layer. Make sure the layer is smooth and flat. Refrigerate until firm.
Top Layer:
In a double boiler or thick-bottomed pan on low heat, melt chocolate, butter and cream until just melted. Mixture should be pourable but not runny. Add more cream if necessary to get the correct consistency. Pour over well-chilled middle layer. Spread evenly by tilting the pan to cover.
Refrigerate well then cut into squares.
Tuesday, November 9, 2010
Our kitchen remodel is in its final throes. It’s starting to become obvious what it’s all going to look like in the end. We still don’t have a sink (and doing the dishes in the bathroom is getting really old) but the island has shaped up nicely and we’re starting to talk about what will go where. We should be done in time to host a rollicking Thanksgiving feast.
 Toaster Oven where soon a sink will be
During the months we’ve been planning and constructing our new kitchen, my thoughts have kept returning to one item. No, it’s not our super cool new bamboo countertop or the soft spongy new cork floor. It’s not the amazing amount of light that now filtered in to what used to be a rather dark space or all that usable storage space just waiting to house my large collection of cooking implements. The one item that has been taking center stage in my thoughts is the garbage can.
 Still under construction but check out the cork floor and bamboo countertop
From the beginning of our project, the garbage can has been worrying me. I could conceive of where I’d store all the items I wouldn’t use while we were working on the kitchen. I found a home for the few dishes and pans that we would need during the remodel. We set up an outdoor cooking space and we have a pretty good system for doing the dishes camp-style with a quick rinse in the bathroom sink. But I couldn’t figure out where the garbage would “live” while we tore the place apart and slowly put it back together.
The can moved from one location to another, always necessary but always in the way. And it was the fact that it was so necessary that really got me thinking.
When did a place to throw stuff away become so essential to my life? For that matter, when did our society decide that it needed to throw away so much stuff and why do we predominately throw it away in the kitchen?
It turns out that our society hasn’t needed the garbage can for very long. It wasn’t until the industrial revolution that we even had enough stuff to think about throwing some of it away. When you only have one change of clothes, you wear them until they fall apart and then you make them into rags or turn the good bits into quilts. When you grow most of your food, you don’t need a plastic bag for the minute it takes to get your head of lettuce from the garden to the kitchen. When the food you do buy from the local store is sold in bulk, you don’t need fancy packaging to lure you into buying it, you just need to bring some kind of reusable container to bring it home in. When you spend a large percentage of your income on food, you don’t let it rot then toss it in the trash, you eat all you can afford, then turn the not so perfect parts into soups or stews and feed the little bits of scrap to the chickens in exchange for eggs. What you really can’t use anymore goes to the junk man who sells it to small manufacturers; rags go to make paper, bottles are refilled, and even bones go to make gelatin, fertilizer, and knife handles.
The industrial revolution made it possible to produce stuff cheaply and, at the same time, gave people more disposable income. Cheap stuff and more money to spend combined to greatly increase the amount of garbage society produced. But it wasn’t until after WWII that we really started throwing stuff away in earnest. Cheap plastics made it possible to produce single-use packaging (in the US, up to 80% of products produced are used only once). Cheap extraction methods put the junk man out of business, making it cheaper to use new materials than recycle what the rag man had to sell. It became cheaper to buy something new rather than fix it. Food became cheaper, we bought more and ended up throwing lots of it away.
Today, the EPA estimates an average US citizen throws away 4.62 pound of garbage a day. 4.62 pounds a day!? No wonder I didn’t know what to do without my garbage can.
And we don’t really throw stuff “away”. It goes somewhere; we’ve just gotten good at hiding it. Today’s landfills aren’t like the midden heaps of yore where we put bits of broken pottery, shells, bones, and rinds in small piles right in town. And they are not like the open dumps of a just half a century ago that were on the edge of town and stunk enough to remind you of where your trash went. The modern sanitary landfill is enormous (some cover thousands of acres) but out of sight of it’s users. All the trash mixes together in a toxic stew, where landfill operators try to keep the toxins from leaching into the groundwater or polluting the air. And, surprise, much of the waste is from the kitchen. The EPA estimates that 31% of waste is from containers and packaging, and 12.5% is from food waste.
Now, I consider myself a pretty eco-conscientious person. We recycle everything we can. We take canvas bags to the store when we shop. I rinse out any plastic bags we acquire and use them multiple times. Jon and I both have a reusable water bottle and coffee mug. And we compost all of our food scraps. We even save all of our bottle caps and wine corks in the hopes that some day we will get creative and make something cool out of them.
So if I’m doing all those thing but still feel like I can’t be without my trashcan, what was in it? It turns out that the EPA had my number. Most of the stuff I tossed was food packaging and meat scraps, plus the occasional dustpan of floor sweepings.
All of the effort of package designers was working. I “needed” to buy my mushrooms covered in plastic and my cookies individually packaged for freshness so I could throw away all those wrappers. Whether I wanted to or not, I had bought into the world of modern convenience and I needed my garbage can handy to deal with the aftermath.
Now that the remodel is just about over, I need a new project. Maybe spending a little more time thinking about my purchases and a little less time filling up the trashcan is a worthy endeavor
Garbage Soup
Ingredients:
Whatever you have in the Fridge plus some water or broth
Directions:
Take a good look in your refrigerator for any leftovers or produce that is past its peek. Leftover chicken or a chicken carcass is a great score. If you have any beef bones from large roasts, those make a great addition as well, and roasting them first brings out even more flavor.
Heat some oil in a stockpot over medium high heat, then chop and add any type of allium (onion, garlic, leeks, shallots, or scallions) you found to the pot. Cook for a few minutes then add any chopped root vegetable or celery. Stir and cook for a few more minutes then add any bones and cover the mixture with water (if you have lots of flavorful ingredients) or broth (if your fridge was pretty empty). Bring to a boil then reduce heat to a simmer. Add any soft veggies. Simmer for about an hour adding more broth or water as needed. If you added bones, strain the soup and return it to the pot. Add any leftover grains or pasta and cook for a few more minutes. Taste and adjust the seasoning. Enjoy your recycled soup!
 Toaster Oven where soon a sink will be
 Still under construction but check out the cork floor and bamboo countertop
The can moved from one location to another, always necessary but always in the way. And it was the fact that it was so necessary that really got me thinking.
When did a place to throw stuff away become so essential to my life? For that matter, when did our society decide that it needed to throw away so much stuff and why do we predominately throw it away in the kitchen?
It turns out that our society hasn’t needed the garbage can for very long. It wasn’t until the industrial revolution that we even had enough stuff to think about throwing some of it away. When you only have one change of clothes, you wear them until they fall apart and then you make them into rags or turn the good bits into quilts. When you grow most of your food, you don’t need a plastic bag for the minute it takes to get your head of lettuce from the garden to the kitchen. When the food you do buy from the local store is sold in bulk, you don’t need fancy packaging to lure you into buying it, you just need to bring some kind of reusable container to bring it home in. When you spend a large percentage of your income on food, you don’t let it rot then toss it in the trash, you eat all you can afford, then turn the not so perfect parts into soups or stews and feed the little bits of scrap to the chickens in exchange for eggs. What you really can’t use anymore goes to the junk man who sells it to small manufacturers; rags go to make paper, bottles are refilled, and even bones go to make gelatin, fertilizer, and knife handles.
The industrial revolution made it possible to produce stuff cheaply and, at the same time, gave people more disposable income. Cheap stuff and more money to spend combined to greatly increase the amount of garbage society produced. But it wasn’t until after WWII that we really started throwing stuff away in earnest. Cheap plastics made it possible to produce single-use packaging (in the US, up to 80% of products produced are used only once). Cheap extraction methods put the junk man out of business, making it cheaper to use new materials than recycle what the rag man had to sell. It became cheaper to buy something new rather than fix it. Food became cheaper, we bought more and ended up throwing lots of it away.
Today, the EPA estimates an average US citizen throws away 4.62 pound of garbage a day. 4.62 pounds a day!? No wonder I didn’t know what to do without my garbage can.
And we don’t really throw stuff “away”. It goes somewhere; we’ve just gotten good at hiding it. Today’s landfills aren’t like the midden heaps of yore where we put bits of broken pottery, shells, bones, and rinds in small piles right in town. And they are not like the open dumps of a just half a century ago that were on the edge of town and stunk enough to remind you of where your trash went. The modern sanitary landfill is enormous (some cover thousands of acres) but out of sight of it’s users. All the trash mixes together in a toxic stew, where landfill operators try to keep the toxins from leaching into the groundwater or polluting the air. And, surprise, much of the waste is from the kitchen. The EPA estimates that 31% of waste is from containers and packaging, and 12.5% is from food waste.
Now, I consider myself a pretty eco-conscientious person. We recycle everything we can. We take canvas bags to the store when we shop. I rinse out any plastic bags we acquire and use them multiple times. Jon and I both have a reusable water bottle and coffee mug. And we compost all of our food scraps. We even save all of our bottle caps and wine corks in the hopes that some day we will get creative and make something cool out of them.
So if I’m doing all those thing but still feel like I can’t be without my trashcan, what was in it? It turns out that the EPA had my number. Most of the stuff I tossed was food packaging and meat scraps, plus the occasional dustpan of floor sweepings.
All of the effort of package designers was working. I “needed” to buy my mushrooms covered in plastic and my cookies individually packaged for freshness so I could throw away all those wrappers. Whether I wanted to or not, I had bought into the world of modern convenience and I needed my garbage can handy to deal with the aftermath.
Now that the remodel is just about over, I need a new project. Maybe spending a little more time thinking about my purchases and a little less time filling up the trashcan is a worthy endeavor
Garbage Soup
Ingredients:
Whatever you have in the Fridge plus some water or broth
Directions:
Take a good look in your refrigerator for any leftovers or produce that is past its peek. Leftover chicken or a chicken carcass is a great score. If you have any beef bones from large roasts, those make a great addition as well, and roasting them first brings out even more flavor.
Heat some oil in a stockpot over medium high heat, then chop and add any type of allium (onion, garlic, leeks, shallots, or scallions) you found to the pot. Cook for a few minutes then add any chopped root vegetable or celery. Stir and cook for a few more minutes then add any bones and cover the mixture with water (if you have lots of flavorful ingredients) or broth (if your fridge was pretty empty). Bring to a boil then reduce heat to a simmer. Add any soft veggies. Simmer for about an hour adding more broth or water as needed. If you added bones, strain the soup and return it to the pot. Add any leftover grains or pasta and cook for a few more minutes. Taste and adjust the seasoning. Enjoy your recycled soup!
Tuesday, October 12, 2010
What Did You Say Was In That Fish?
The first ever Non-GMO month is this month. The Non-GMO Project is sponsoring it and we should all be celebrating.
Why celebrate and what the heck is a GMO, you ask? We should be celebrating our right to choose foods that have not been genetically modified. GMOs (Genetically Modified Organisms, also known as Genetically Engineered (GE) foods) are foods that have been bred, not in the age old way of crossing the genes from the same species to get better traits, but by inserting genes from a completely different species into a plant or animal to, hopefully, get a new trait.
For example if you take a gene from the eel-like ocean pout that keeps them from freezing and a gene from Chinook salmon that makes them the largest salmon in nature and splice them into an Atlantic Salmon, you get a salmon that grows twice as fast and gets twice as big as it’s non-GMO cousin.
These “salmon” are nothing like their natural cousins. The company that designed them knows this and knows that if these “frankenfish” were to escape into the wild population there is strong evidence to suggest they would do irreparable harm to the native species (miraculously, the FDA didn’t rubberstamp their approval as a food fish last week, although it still may approve them pending further study).
This is very different from the way Nature does things (I’m pretty sure there’s no way for pouts and salmon to breed in the wild). Sure, humankind has been tinkering with the genetic makeup of plants and animals since we first domesticated them, but we could only do it the way nature did it, just a little bit faster.
Today the technology exists to cross the species barrier and we’ve been doing it for the past 20 years. And you’ve been eating the results of that technology for almost that long.
According to the USDA, plantings of GM soybeans, corn, and cotton this year are at all time highs with 93% of soybeans, 86% of corn, and 93% of the cotton planted in the United States being genetically modified. 80% of Hawaiian papaya, 93% of canola, 95% of sugar beets, and 13% of zucchini planted in the US are also genetically modified. 50% of all GMO crops are grown in the US.
That’s a whole lot of food. Considering the fact that almost all processed food contains at least one of those ingredients, we’re all eating GMOs. Although, when asked, over 50% of Americans think they’ve never eaten the stuff.
That’s because there is no way to find out if there are GMOs in your food (unless you want to pay a lot of money to get them tested). There is no law that requires these products to be labeled like there is in Europe and many other countries, and which, in a recent survey, 90% of Americans want. Our government has decided that genetically engineered food is “substantially equivalent” to the original and therefore requires no special label and, even scarier than that, no special safety testing. (Interestingly, that same food is different enough to allow the company that makes it to patent it).
For years, consumer groups have been pressing for labeling laws to no avail. That’s where the Non-GMO Project comes in. The Project is a non-profit, third party certifier. They test products for genetic markers and set up rigorous traceability and segregation practices to ensure the food with their seal is 99.1% GMO-free. This month is the launch of the program and a few hundred products have been certified already. There are almost 2000 more items awaiting testing results and more are being added every day.
Labeling of some kind can’t happen too soon. GMOs have been on the market for a short period of time but there are already indications that they are causing environmental harm and could have detrimental effects on us.
GE crops that are designed to resist the herbicide Round-up are now having to be sprayed with more toxic chemicals because the weeds that grow along side them that were supposed to be killed by one spray of Round-up are now becoming resistant to it and farmers are having to resort to stronger herbicides to keep the weeds at bay.
The Bt bacteria, which is a naturally occurring pesticide and is used by organic farmers but which is present in every cell of GE corm and cotton, is showing up in the waterways around GE corn fields. What that will do to the beneficial insects that live and lay eggs in those waters is unknown.
Lab tests of mice and rats that are fed a diet of GMO foods to mimic the amount of GMOs that Americans are currently eating show sterility and organ deformation after several generations. Even though the industry that is promoting GMOs (read Monsanto) says that after 20 years, there are no adverse health effects from eating GMO crops, these tests indicate that it may be our great grandchildren who will pay the price for us to be guinea pigs in this experiment.
The fact that the Non-GMO Project, which wants to make sure we are eating GMO-free, can’t guarantee that a food is 100% natural is also scary. This means that “genetic drift” is occurring and we may soon not have a choice in what foods we eat. Pollen from GMO plants can transfer to organic and non-GMO crops contaminating them with their engineered genes.
It’s not all doom and gloom. There are some encouraging things going on in the world of GMOs. The Non-GMO project is a good example. The group was started by concerned retailers, distributors and manufacturers of natural foods. There are almost 500 retailers (of which Winter Ridge is one) and at least 170 manufacturers supporting the effort. And that’s in the first year.
An Ohio judge just overturned a state law that banned dairies from labeling their milk rBGH-free. rBGH is a genetically engineered form of a naturally occurring growth hormone and is injected in cows to make them produce more milk. The judge ruled that scientific evidence showed milk from cows treated with rBGH is inferior to unadulterated milk. It contains more pus and less nutrients and consumers therefore have a right to know if their milk is from treated cows.
In August, a court order stopped the planting of GE sugar beets until further environmental testing could be done. Although the USDA is trying to step around the ruling, the direction the court took is encouraging.
An overwhelming resistance to genetically engineered wheat has kept it out of the market for at least 4 years. Hopefully the wheat farmers and global wheat buyers will continue to resist the introduction of yet another GE crop.
We can continue to fight the battle to keep genetically engineered foods out of our food system. One thing you and I can do is stop eating the stuff. Buy organic and look for the Non-GMO product label. If there is no market for GMOs then there’s no money to be made from them and no one will want to grow them. Get educated. There is lots of information out there about the effects of GMOs and how to avoid them on the web and in print. Get involved. Tell the USDA you want a choice in what you eat and want labeling and safety testing. Write your senators and representatives and tell them you want to know what you’re eating.
One of the things that most amazed me in researching this article is animals like cows, pigs, chickens, and even rats when given the choice between GE and non-GE foods picked the non-GE choice. We’ve got to be as smart as rats, don’t we?
Grilled Salmon with Miso Marinade
serves 4
2 T organic white miso paste from non-GMO soy
2 T mirin (Japanese rice wine)
1 T organic tamari from non-GMO soy
1 T minced fresh ginger
2 t cane sugar (not GMO beet sugar)
4 wild Alaskan salmon fillets (not GM frankensalmon although farmed salmon is almost as bad as the GMO stuff) (even better, buy wild salmon caught buy Sandpoint fishermen like Chris White)
2 T thinly sliced scallions, green parts only
1 T toasted sesame seeds
Mix together miso, mirin, tamari, ginger and sugar in a small bowl. Place salmon fillets, skin side down, in a shallow pan and brush mixture onto fillets. Allow to stand at room temp for 1/2 hour.
Start a charcoal or gas grill.
Grill salmon, skin side down, until the thickest part just turns opaque. Serve immediately, topped with scallions and sesame seeds.
Why celebrate and what the heck is a GMO, you ask? We should be celebrating our right to choose foods that have not been genetically modified. GMOs (Genetically Modified Organisms, also known as Genetically Engineered (GE) foods) are foods that have been bred, not in the age old way of crossing the genes from the same species to get better traits, but by inserting genes from a completely different species into a plant or animal to, hopefully, get a new trait.
For example if you take a gene from the eel-like ocean pout that keeps them from freezing and a gene from Chinook salmon that makes them the largest salmon in nature and splice them into an Atlantic Salmon, you get a salmon that grows twice as fast and gets twice as big as it’s non-GMO cousin.
These “salmon” are nothing like their natural cousins. The company that designed them knows this and knows that if these “frankenfish” were to escape into the wild population there is strong evidence to suggest they would do irreparable harm to the native species (miraculously, the FDA didn’t rubberstamp their approval as a food fish last week, although it still may approve them pending further study).
This is very different from the way Nature does things (I’m pretty sure there’s no way for pouts and salmon to breed in the wild). Sure, humankind has been tinkering with the genetic makeup of plants and animals since we first domesticated them, but we could only do it the way nature did it, just a little bit faster.
Today the technology exists to cross the species barrier and we’ve been doing it for the past 20 years. And you’ve been eating the results of that technology for almost that long.
According to the USDA, plantings of GM soybeans, corn, and cotton this year are at all time highs with 93% of soybeans, 86% of corn, and 93% of the cotton planted in the United States being genetically modified. 80% of Hawaiian papaya, 93% of canola, 95% of sugar beets, and 13% of zucchini planted in the US are also genetically modified. 50% of all GMO crops are grown in the US.
That’s a whole lot of food. Considering the fact that almost all processed food contains at least one of those ingredients, we’re all eating GMOs. Although, when asked, over 50% of Americans think they’ve never eaten the stuff.
That’s because there is no way to find out if there are GMOs in your food (unless you want to pay a lot of money to get them tested). There is no law that requires these products to be labeled like there is in Europe and many other countries, and which, in a recent survey, 90% of Americans want. Our government has decided that genetically engineered food is “substantially equivalent” to the original and therefore requires no special label and, even scarier than that, no special safety testing. (Interestingly, that same food is different enough to allow the company that makes it to patent it).
For years, consumer groups have been pressing for labeling laws to no avail. That’s where the Non-GMO Project comes in. The Project is a non-profit, third party certifier. They test products for genetic markers and set up rigorous traceability and segregation practices to ensure the food with their seal is 99.1% GMO-free. This month is the launch of the program and a few hundred products have been certified already. There are almost 2000 more items awaiting testing results and more are being added every day.
Labeling of some kind can’t happen too soon. GMOs have been on the market for a short period of time but there are already indications that they are causing environmental harm and could have detrimental effects on us.
GE crops that are designed to resist the herbicide Round-up are now having to be sprayed with more toxic chemicals because the weeds that grow along side them that were supposed to be killed by one spray of Round-up are now becoming resistant to it and farmers are having to resort to stronger herbicides to keep the weeds at bay.
The Bt bacteria, which is a naturally occurring pesticide and is used by organic farmers but which is present in every cell of GE corm and cotton, is showing up in the waterways around GE corn fields. What that will do to the beneficial insects that live and lay eggs in those waters is unknown.
Lab tests of mice and rats that are fed a diet of GMO foods to mimic the amount of GMOs that Americans are currently eating show sterility and organ deformation after several generations. Even though the industry that is promoting GMOs (read Monsanto) says that after 20 years, there are no adverse health effects from eating GMO crops, these tests indicate that it may be our great grandchildren who will pay the price for us to be guinea pigs in this experiment.
The fact that the Non-GMO Project, which wants to make sure we are eating GMO-free, can’t guarantee that a food is 100% natural is also scary. This means that “genetic drift” is occurring and we may soon not have a choice in what foods we eat. Pollen from GMO plants can transfer to organic and non-GMO crops contaminating them with their engineered genes.
It’s not all doom and gloom. There are some encouraging things going on in the world of GMOs. The Non-GMO project is a good example. The group was started by concerned retailers, distributors and manufacturers of natural foods. There are almost 500 retailers (of which Winter Ridge is one) and at least 170 manufacturers supporting the effort. And that’s in the first year.
An Ohio judge just overturned a state law that banned dairies from labeling their milk rBGH-free. rBGH is a genetically engineered form of a naturally occurring growth hormone and is injected in cows to make them produce more milk. The judge ruled that scientific evidence showed milk from cows treated with rBGH is inferior to unadulterated milk. It contains more pus and less nutrients and consumers therefore have a right to know if their milk is from treated cows.
In August, a court order stopped the planting of GE sugar beets until further environmental testing could be done. Although the USDA is trying to step around the ruling, the direction the court took is encouraging.
An overwhelming resistance to genetically engineered wheat has kept it out of the market for at least 4 years. Hopefully the wheat farmers and global wheat buyers will continue to resist the introduction of yet another GE crop.
We can continue to fight the battle to keep genetically engineered foods out of our food system. One thing you and I can do is stop eating the stuff. Buy organic and look for the Non-GMO product label. If there is no market for GMOs then there’s no money to be made from them and no one will want to grow them. Get educated. There is lots of information out there about the effects of GMOs and how to avoid them on the web and in print. Get involved. Tell the USDA you want a choice in what you eat and want labeling and safety testing. Write your senators and representatives and tell them you want to know what you’re eating.
One of the things that most amazed me in researching this article is animals like cows, pigs, chickens, and even rats when given the choice between GE and non-GE foods picked the non-GE choice. We’ve got to be as smart as rats, don’t we?
Grilled Salmon with Miso Marinade
serves 4
2 T organic white miso paste from non-GMO soy
2 T mirin (Japanese rice wine)
1 T organic tamari from non-GMO soy
1 T minced fresh ginger
2 t cane sugar (not GMO beet sugar)
4 wild Alaskan salmon fillets (not GM frankensalmon although farmed salmon is almost as bad as the GMO stuff) (even better, buy wild salmon caught buy Sandpoint fishermen like Chris White)
2 T thinly sliced scallions, green parts only
1 T toasted sesame seeds
Mix together miso, mirin, tamari, ginger and sugar in a small bowl. Place salmon fillets, skin side down, in a shallow pan and brush mixture onto fillets. Allow to stand at room temp for 1/2 hour.
Start a charcoal or gas grill.
Grill salmon, skin side down, until the thickest part just turns opaque. Serve immediately, topped with scallions and sesame seeds.
Tuesday, September 14, 2010
Kitchen Transformational
I moved to Sandpoint about 3 1/2 years ago and moved in with my then boyfriend now husband, Jon. He has lived here all his life and has lived in the same house for 30 years. He’s raised two boys in the house and you could kind of tell.
We did a bunch of remodeling when I first moved up, replacing the floors, doors, and trim in the living room and the bedrooms right away. We removed old wallpaper and repainted. About a year later we worked over one of the bathrooms. Then we added a garden out back and replaced the old aluminum frame windows with something that didn’t grow mold all winter.
All the time we’ve been working on the house, we knew we would eventually remodel the kitchen but it seemed like such a daunting task. We use our kitchen a lot and cook dinner from scratch almost every night. I bake bread and other treats on a regular basis.
We don’t have TV so we spend most of our evenings hanging out cooking and eating. What would our life be like living without a kitchen for the time it took to remodel? Would we be able to endure it? We’re starting to find out.
This is no simple remodel. The cabinets and appliances are all being replaced and, most importantly, we’re replacing the floor. This means at some point, we will have to empty everything out of the kitchen. No fridge, no oven, and no horizontal surfaces (unless you include the floor, which we can’t, since we’re replacing it)
We’re still in the beginning stages of the remodel so I’m guessing it’s going to get a lot worse, but I’ve already starting to realize it’s not going to be easy.
The first thing I did was pack up anything that I thought we could live without for a few months. Those sushi plates that are so beautiful to look at and that I only use once a year (maybe) were an easy call. So were the Santa mugs (please, let us be done before Christmas).
The Cuisinart was a harder decision. I use it fairly regularly but couldn’t I realistically do without it for this relatively brief time and just chop stuff up the old fashioned way? I packed it and two weeks later I was wishing I hadn’t.
However, one lesson I’ve learned during this packing extravaganza is that we own a bunch of stuff that we just don’t really need. The meat grinder is nice to have when you want it but couldn’t we live the rest of our lives without it and still be happy. Do we really need all 50+ cookbooks or could we happily make do with the six I didn’t pack and find anything else we wanted on-line? Why do we have so much stuff and, worse yet, why do I miss it now that I can’t get to it even if I’d forgotten about it until I packed it?
I also learned that having a pantry is essential to being able to get rid of your upper cabinets and still be able to have a functioning kitchen. We wanted to be able to do some of the prep work and some of the painting before we took out all the cabinets and this required the removal of our upper cabinets; you know the ones with everything you use on a regular basis right there in front of you and super handy?
Well, all that stuff had to go somewhere. Some of it went into the space vacated by packing some of the stuff in the lower cabinets, some of it got packed, and a ridiculous amount of it went into the pantry that Jon built over the winter. The pantry is now completely full and it is amazing how much you can fit in a well-designed 3’x3’x8’ closet. It is also astounding how hard it is to find anything in there now.
I’ve come to realize that there is a reason why there are upper cabinets in most kitchens. While we are making due with not having any (and really enjoying the openness of the kitchen without them), not having glasses and coffee mugs (not to mention plates, olive oil, spices, etc.) within easy reach is getting to be a pain.
I’ve also noticed what creatures of habit we are. Everything had a home before we started this project and now neither of us knows where the other person decided the temporary home of an item should be. (In fact, Jon just interrupted my writing to ask where I had put his saucepan.) Where stuff lives now depends on who puts away the dishes.
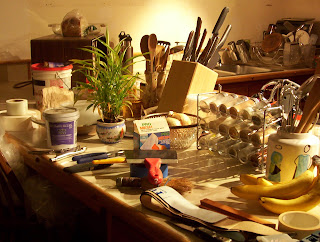 The Countertop
We still have quite a ways to go before life in the kitchen returns to normal and I’m sure there will be more lessons learned along the way (like just how unenjoyable it is to do the dinner dishes in the bathtub). For now, we are still having fun (and getting along just fine, thank you). We both believe that whatever else this remodel throws at us, the new kitchen will be worth the struggle.
Keep Your Man Happy While He Remodels The Kitchen Blue Cheese Dressing
Adapted from The Best of Thymes by Marge Clark
Makes 2 ½ c
½ c sour cream
½ c plain yogurt (I use non-fat to try and counteract all the other fat in the recipe)
1 c mayonnaise
8 oz. blue cheese, crumbled
3 cloves garlic, minced
2 t apple cider vinegar
½ t salt
pepper to taste
1 T fresh chives, chopped (optional)
Mix all the ingredients together well. Best if placed in a glass jar and refrigerated overnight, but damned tasty even if you can’t wait. Will keep up to a month but probably won’t last that long.
We did a bunch of remodeling when I first moved up, replacing the floors, doors, and trim in the living room and the bedrooms right away. We removed old wallpaper and repainted. About a year later we worked over one of the bathrooms. Then we added a garden out back and replaced the old aluminum frame windows with something that didn’t grow mold all winter.
All the time we’ve been working on the house, we knew we would eventually remodel the kitchen but it seemed like such a daunting task. We use our kitchen a lot and cook dinner from scratch almost every night. I bake bread and other treats on a regular basis.
We don’t have TV so we spend most of our evenings hanging out cooking and eating. What would our life be like living without a kitchen for the time it took to remodel? Would we be able to endure it? We’re starting to find out.
This is no simple remodel. The cabinets and appliances are all being replaced and, most importantly, we’re replacing the floor. This means at some point, we will have to empty everything out of the kitchen. No fridge, no oven, and no horizontal surfaces (unless you include the floor, which we can’t, since we’re replacing it)
We’re still in the beginning stages of the remodel so I’m guessing it’s going to get a lot worse, but I’ve already starting to realize it’s not going to be easy.
The first thing I did was pack up anything that I thought we could live without for a few months. Those sushi plates that are so beautiful to look at and that I only use once a year (maybe) were an easy call. So were the Santa mugs (please, let us be done before Christmas).
The Cuisinart was a harder decision. I use it fairly regularly but couldn’t I realistically do without it for this relatively brief time and just chop stuff up the old fashioned way? I packed it and two weeks later I was wishing I hadn’t.
However, one lesson I’ve learned during this packing extravaganza is that we own a bunch of stuff that we just don’t really need. The meat grinder is nice to have when you want it but couldn’t we live the rest of our lives without it and still be happy. Do we really need all 50+ cookbooks or could we happily make do with the six I didn’t pack and find anything else we wanted on-line? Why do we have so much stuff and, worse yet, why do I miss it now that I can’t get to it even if I’d forgotten about it until I packed it?
I also learned that having a pantry is essential to being able to get rid of your upper cabinets and still be able to have a functioning kitchen. We wanted to be able to do some of the prep work and some of the painting before we took out all the cabinets and this required the removal of our upper cabinets; you know the ones with everything you use on a regular basis right there in front of you and super handy?
Well, all that stuff had to go somewhere. Some of it went into the space vacated by packing some of the stuff in the lower cabinets, some of it got packed, and a ridiculous amount of it went into the pantry that Jon built over the winter. The pantry is now completely full and it is amazing how much you can fit in a well-designed 3’x3’x8’ closet. It is also astounding how hard it is to find anything in there now.
I’ve come to realize that there is a reason why there are upper cabinets in most kitchens. While we are making due with not having any (and really enjoying the openness of the kitchen without them), not having glasses and coffee mugs (not to mention plates, olive oil, spices, etc.) within easy reach is getting to be a pain.
I’ve also noticed what creatures of habit we are. Everything had a home before we started this project and now neither of us knows where the other person decided the temporary home of an item should be. (In fact, Jon just interrupted my writing to ask where I had put his saucepan.) Where stuff lives now depends on who puts away the dishes.
The last lesson I’ve learned (so far) is one I’ve always known but it’s never been driven home quite like this: horizontal surfaces collect a lot of stuff. Our countertop was always the collection point for the mail, for reminder notes, or for things that didn’t quite have a home yet.
But now there are so many things without a home that no horizontal surface is off limits. The dining room chairs stacked upside-down in the living room are home the paper towels and the paper towel holder (which had to be removed from the wall for painting). The step stool has some sanding pads and a couple of energy bars on top. And the counter is covered with such a variety of food and building supplies, I don’t have the time to go into it.
But now there are so many things without a home that no horizontal surface is off limits. The dining room chairs stacked upside-down in the living room are home the paper towels and the paper towel holder (which had to be removed from the wall for painting). The step stool has some sanding pads and a couple of energy bars on top. And the counter is covered with such a variety of food and building supplies, I don’t have the time to go into it.
 The Countertop
Keep Your Man Happy While He Remodels The Kitchen Blue Cheese Dressing
Adapted from The Best of Thymes by Marge Clark
Makes 2 ½ c
½ c sour cream
½ c plain yogurt (I use non-fat to try and counteract all the other fat in the recipe)
1 c mayonnaise
8 oz. blue cheese, crumbled
3 cloves garlic, minced
2 t apple cider vinegar
½ t salt
pepper to taste
1 T fresh chives, chopped (optional)
Mix all the ingredients together well. Best if placed in a glass jar and refrigerated overnight, but damned tasty even if you can’t wait. Will keep up to a month but probably won’t last that long.
Subscribe to:
Posts (Atom)